Automation
or the lie that is DevOps
- Ansible inventory from a csv file.
- AWX on CentOS 8
- Control Node Setup
- Inventory from gathered facts.
- oVirt - Windows Template
- vCenter - Linux Templates
- Windows Build Server
- Windows Managed Node Setup
Ansible inventory from a csv file.
General
Create an Ansible inventory in YAML format using the following steps.
Assuming that the CSV file has the following structure:
Hostname,IP Address,Variable1,Variable2,Variable3
host1,192.168.1.1,value1,value2,value3
host2,192.168.1.2,value4,value5,value6
Local Use
-
Convert the CSV file to a YAML file format
-
Use Ansible's
yaml_inventory_pluginto parse the YAML file and create the inventory
Sample playbook
---
- hosts: localhost
  gather_facts: no

  vars:
    csv_file: /path/to/csv/file.csv
    yaml_file: /path/to/yaml/file.yaml

  tasks:
    - name: Convert CSV to YAML
      community.general.csv_to_yaml:
        path: "{{ csv_file }}"
        output_file: "{{ yaml_file }}"

    - name: Create inventory from YAML
      ansible.builtin.add_host:
        name: "{{ item.Hostname }}"
        ansible_host: "{{ item['IP Address'] }}"
        variable1: "{{ item.Variable1 }}"
        variable2: "{{ item.Variable2 }}"
        variable3: "{{ item.Variable3 }}"
      loop: "{{ lookup('yaml', yaml_file) }}"
In this example, the csv_to_yaml Ansible Galaxy module is used to convert the CSV file to YAML format. The add_host module is then used to create the inventory based on the YAML file contents.
You can run this playbook with the following command:
ansible-playbook -i localhost, inventory.yml
AWX/AAP/Tower
Assuming that the CSV file has the following structure:
group,host,IP Address,Variable1,Variable2,Variable3
group1,host1,192.168.1.1,value1,value2,value3
group2,host2,192.168.1.2,value4,value5,value6
group2,host3,192.168.1.3,value4,value5,value6
Here's an example Ansible playbook that reads a CSV file and creates an inventory in Ansible AWX, or Ansible Automation Platform.
You'll need to fill in the values for tower_host, tower_username, tower_password, tower_org, tower_inventory_name, and csv_file.
The playbook has four tasks:
- Load CSV file: This task loads the CSV file and stores the content in the csv_content variable.
- Create groups in Ansible Tower: This task creates groups in Ansible Tower based on the values in the group column of the CSV file. The loop parameter iterates over the unique values of the group column.
- Create hosts in Ansible Tower: This task creates hosts in Ansible Tower based on the values in the host column of the CSV file. The loop parameter iterates over the unique values of the host column.
- Add host variables to Ansible Tower hosts: This task adds variables to the hosts in Ansible Tower based on the values in the CSV file. The loop parameter iterates over each row in the CSV file.
---
- name: Create Ansible Tower Inventory from CSV
  hosts: localhost
  gather_facts: no

  vars:
    csv_file: /path/to/csv/file.csv
    tower_host: <Ansible Tower Host>
    tower_username: <Ansible Tower Username>
    tower_password: <Ansible Tower Password>
    tower_org: <Ansible Tower Organization>
    tower_inventory_name: <Ansible Tower Inventory Name>

  tasks:
    - name: Load CSV file
      read_csv:
        path: "{{ csv_file }}"
        delimiter: ","
      register: csv_content

    - name: Create groups in Ansible Tower
      tower_group:
        tower_host: "{{ tower_host }}"
        tower_username: "{{ tower_username }}"
        tower_password: "{{ tower_password }}"
        tower_organization: "{{ tower_org }}"
        name: "{{ item.group }}"
        state: present
      loop: "{{ csv_content.list | unique('group') }}"

    - name: Create hosts in Ansible Tower
      tower_host:
        tower_host: "{{ tower_host }}"
        tower_username: "{{ tower_username }}"
        tower_password: "{{ tower_password }}"
        tower_organization: "{{ tower_org }}"
        inventory_name: "{{ tower_inventory_name }}"
        name: "{{ item.host }}"
        state: present
      loop: "{{ csv_content.list | unique('host') }}"

    - name: Add host variables to Ansible Tower hosts
      tower_host:
        tower_host: "{{ tower_host }}"
        tower_username: "{{ tower_username }}"
        tower_password: "{{ tower_password }}"
        tower_organization: "{{ tower_org }}"
        inventory_name: "{{ tower_inventory_name }}"
        name: "{{ item.host }}"
        variables: "{{ item.vars }}"
        state: present
      loop: "{{ csv_content.list }}"
A config file can be used in place of credentials being located in the playbook.
The ~/.tower_cli.cfg file is a configuration file used by the Ansible Tower CLI tool, tower-cli. It is located in the home directory of the user running tower-cli.
This file stores configuration settings for tower-cli such as the URL of the Ansible Tower server, the username and password used to authenticate to the server, and other options related to the tool's behavior.
[tower]
host = https://my-ansible-tower-server.com
username = my-username
password = my-password
verify_ssl = false
In this example, the [tower] section specifies the configuration settings for the Ansible Tower server. The host parameter specifies the URL of the server, while the username and password parameters specify the credentials used to authenticate to the server. The verify_ssl parameter can be set to true or false to indicate whether SSL certificates should be verified when making requests to the server.
By default, tower-cli looks for the ~/.tower_cli.cfg file in the user's home directory. However, you can specify a different location for the configuration file by setting the TOWERCLI_CONFIG environment variable to the path of the file.
AWX on CentOS 8
Log in to your CentOS 8 server, open a terminal window, and issue the following commands:
sudo dnf install epel-release -y
sudo dnf install git gcc gcc-c++ ansible nodejs gettext device-mapper-persistent-data lvm2 bzip2 python3-pip -y
How to install Docker and Docker Compose
(Podman coming soon.)
We now need to install both Docker and Docker Compose. The first thing to do is add the necessary repository with the command:
sudo dnf config-manager --add-repo=https://download.docker.com/linux/centos/docker-ce.repoOnce the repository is added, install the latest version of Docker with the command:
sudo dnf install docker-ce-3:18.09.1-3.el7 -yStart and enable the Docker engine with the commands:
sudo systemctl start docker
sudo systemctl enable docker
Add your user to the docker group with the command:
sudo usermod -aG docker $USERLog out and log back in.
Install docker-compose via pip3 with the command:
sudo pip3 install docker-composeFinally, set python to use Python 3 with the command:
alternatives --set python /usr/bin/python3How to install AWX
Now we can finally install AWX. Clone the latest release with the command:
git clone https://github.com/ansible/awx.gitNext, generate a secret encryption key with the command:
openssl rand -base64 30Copy the key that is generated to your clipboard.
Change into the newly downloaded AWX directory with the command:
cd awx/installerOpen the AWX inventory file with the command:
nano inventoryIn that file, you'll need to (at a minimum), edit the following configuration options. First, locate the line:
secret_key=In that line, paste the secret key you generated earlier.
Next, look for the line:
admin_password=passwordChange the password to a strong, unique password.
Finally, look for the line that starts with:
#awx_alternate_dns_servers=Change that line to:
awx_alternate_dns_servers="8.8.8.8,8.8.4.4"You can then go through the rest of the inventory file and edit as needed. But, the above changes should result in a successful installation.
Create a directory for Postgres with the command:
sudo mkdir /var/lib/pgdockerInstall AWX with the command:
sudo ansible-playbook -i inventory install.ymlThis should take about five to10 minutes to complete.
SELinux and firewall
Before we can access the AWX site, we need to disable SELinux. Issue the command:
sudo nano /etc/sysconfig/selinuxChange the line:
SELINUX=enforcingTo:
SELINUX=disabledSave and close the file. Restart your system so the changes will take effect.
The last step is to modify the firewall. This is done with the following commands:
sudo firewall-cmd --zone=public --add-masquerade --permanent
sudo firewall-cmd --permanent --add-service=http
sudo firewall-cmd --permanent --add-service=https
sudo firewall-cmd --reload
Control Node Setup
A deployment controller could be a dedicated server or a workstation.
From command line
Clone the Private Data System repository
git clone https://github.com/clusterapps/PrivateSystem.gitReview required settings.
From Tower or AWX
A:) Clone and modify for your own environment
git clone https://git.clusterapps.com/ansible/tower-pds-base.gitB:) Create a new Project and assign to specific groups.
step-by-step coming soon
Additional Settings
Additional items for a Windows environment.
Download the Windows virtio drivers. These drivers are needed to Windows guests running on KVM.
On a web server or software distribution server:
wget https://fedorapeople.org/groups/virt/virtio-win/virtio-win.repo -O /etc/yum.repos.d/virtio-win.repo
yum install -y virtio-win
cp /usr/share/virtio-win/virtio-win.iso /var/www/html/iso/
Inventory from gathered facts.
Playbook example
---
- name: Generate YAML Inventory File from Gathered Facts
  hosts: all
  gather_facts: true
  tasks:
    - name: Gather facts from hosts
      setup:

    - name: Create YAML inventory file
      copy:
        content: |
          all:
            children:
              hosts:
                hosts:
          {{ hostvars[item].inventory_hostname }}:
            ansible_host: {{ hostvars[item].ansible_host }}
            ansible_user: {{ hostvars[item].ansible_user }}
            ansible_port: {{ hostvars[item].ansible_port }}
            ansible_ssh_pass: {{ hostvars[item].ansible_ssh_pass | default('') }}
            ansible_ssh_private_key_file: {{ hostvars[item].ansible_ssh_private_key_file | default('') }}
          inventory_hostname: {{ hostvars[item].inventory_hostname }}
        dest: /path/to/your/output/inventory.yaml
        mode: 0644
      loop: "{{ ansible_play_batch }}"
      run_once: yes
We define a play named "Generate YAML Inventory File from Gathered Facts" that runs on all hosts (hosts: all) and enables fact gathering with gather_facts: true.

In the first task, we use the setup module to gather facts from the hosts.

In the second task, we use the copy module to create the YAML inventory file. We loop through each host in ansible_play_batch (which contains all the hosts that ran this play) and format the gathered facts into the inventory file.

    ansible_host, ansible_user, ansible_port, ansible_ssh_pass, ansible_ssh_private_key_file, and inventory_hostname are some of the facts we include in the inventory file.

    The inventory file is saved at the specified destination path (/path/to/your/output/inventory.yaml) with appropriate file permissions (mode 0644).
Make sure to replace /path/to/your/output/inventory.yaml with the actual path where you want to save the generated YAML inventory file.
You can run this playbook with the ansible-playbook command:
oVirt - Windows Template
To create an Ansible playbook that deploys a Windows VM from a template on oVirt, customizes the OS with sysprep, sets unique hostname and static IP, and performs other specified configurations, follow the structure below. This example assumes you have a sysprep file ready for Windows customization and your oVirt environment is properly set up for Ansible integration.
First, ensure you have the ovirt.ovirt collection installed, which includes modules for interacting with oVirt. If not, you can install it using Ansible Galaxy:
ansible-galaxy collection install ovirt.ovirt
Here's an example playbook that meets your requirements. You'll need to adjust variables and possibly the paths to files (like the sysprep file) to match your environment.
---
- name: Deploy and customize a Windows VM on oVirt
  hosts: localhost
  gather_facts: no
  collections:
    - ovirt.ovirt

  vars:
    ovirt_engine_url: https://ovirt-engine.example.com/ovirt-engine/api
    ovirt_engine_username: admin@internal
    ovirt_engine_password: your_password
    ovirt_engine_cafile: /path/to/your/ovirt-engine.ca
    vm_domain: "example.com"
    vm_subnet: "255.255.255.0"
    vm_gateway: "10.10.10.1"
    vm_dns: "10.1.10.10"
    additional_disk_size: 20GB
    machines:
      - { name: dc01, memory: 4GiB, cluster: kvm_worker, template: Windows2022Core, datasize: 90, storage: data-kvm2, tag: lab, ip: 10.10.10.12}
      - { name: dc02, memory: 4GiB, cluster: kvm_worker, template: Windows2022Core, datasize: 90, storage: data-kvm2, tag: lab, ip: 10.10.10.11}
      - { name: wadm01, memory: 8GiB, cluster: kvm_worker,  template: Windows2022, datasize: 90, storage: data-kvm2, tag: lab, ip: 10.10.10.10}

  tasks:
    - name: Log into oVirt
      ovirt.ovirt.ovirt_auth:
        url: "{{ ovirt_engine_url }}"
        username: "{{ ovirt_engine_username }}"
        password: "{{ ovirt_engine_password }}"
        ca_file: "{{ ovirt_engine_cafile }}"
        state: present

    - name: Deploy VMs
      ovirt.ovirt.ovirt_vm:
        auth: "{{ ovirt_auth }}"
        name: "{{ item.name }}.{{ vm_domain }}"
        template: "{{ item.template }}"
        cluster: "{{ item.cluster }}"
        cpu_cores: 2
        cpu_sockets: 1
        memory: "{{ item.memory }}"
        sysprep:
          hostname: "{{ item.name | upper}}"
          ip: "{{ item.ip }}"
          netmask: "{{ vm_subnet }}"
          gateway: "{{ vm_gateway }}"
          dns_servers: "{{ vm_dns }}"
          domain: "{{ vm_domain }}"
          root_password: "{{ vm_admin }}"
        state: present
      with_items:
        - "{{ machines }}"

    - name: Add Software Storage
      ovirt.ovirt.ovirt_disk:
        auth: "{{ ovirt_auth }}"
        name: "{{ item.name }}-Disk2"
        vm_name: "{{ item.name }}.{{ vm_domain }}"
        size: "{{ item.datasize }}GiB"
        format: cow
        interface: virtio_scsi
        storage_domain: "{{ item.storage }}"
      with_items:
        - "{{ machines }}"

    - name: Start VMs
      ovirt.ovirt.ovirt_vm:
        auth: "{{ ovirt_auth }}"
        name: "{{ item.name }}.{{ vm_domain }}"
        state: running
      with_items:
        - "{{ machines }}"

    - name: Tag machines
      ovirt.ovirt.ovirt_tag:
        auth: "{{ ovirt_auth }}"
        name: "{{ item.tag }}"
        state: attached
        vms:
          - "{{ item.name }}.{{ vm_domain }}"
      with_items:
        - "{{ machines }}"


    # Assuming the VM is to be powered on after setup
    - name: VMs should be running
      ovirt.ovirt.ovirt_vm:
        auth: "{{ ovirt_auth }}"
        name: "{{ vm_hostname }}"
        state: running

    - name: Logout from oVirt
      ovirt.ovirt.ovirt_auth:
        state: absent
        auth: "{{ ovirt_auth }}"
Remember to replace placeholders (like URLs, credentials, paths, domain names, and the storage domain) with your actual data. Also, ensure your sysprep file is correctly set up in your template or specified directly in the playbook if needed.
This playbook performs the following actions:
- Logs into the oVirt engine.
- Creates a VM from a specified template with a unique hostname and configures it with sysprep.
- Adds an additional 100GB disk to the VM.
- Configures the VM's network interface.
- Powers on the VM after setup.
- Logs out from the oVirt engine.
Test this playbook in a development environment before using it in production. Adjustments may be necessary based on your specific oVirt setup, Windows template, and network configuration.
vCenter - Linux Templates
To deploy multiple VMs with different hostnames and IP addresses while utilizing the customization capabilities provided by the vmware_guest module in Ansible, you can use VMware's customization specifications. This approach allows for more advanced customization options, such as setting the domain, hostname, and network settings directly within the playbook. Below is an example of how to modify the playbook to use VMware's customization feature for deploying 3 VMs with distinct configurations:
Inventory
To create a separate inventory file with all the variables used in the provided playbook, you'll need to organize these variables in a structured way. Ansible inventory files can be in INI or YAML format, but for complex configurations like this, YAML is more suitable due to its support for hierarchical data.
Below is an example of how to create an Ansible inventory file in YAML format (inventory.yml) that defines all the variables required by your playbook. This example demonstrates setting up variables for deploying three VMs, but you can adjust the quantities and details as needed:
all:
  vars:
    vcenter_hostname: vcenter.example.com
    vcenter_username: admin@vsphere.local
    vcenter_password: securepassword
    vcenter_datacenter: DC1
    vcenter_folder: /DC1/vm/ansible_managed_vms
    vcenter_cluster: Cluster1
    vm_template: CentOS_Template
    vm_network: VM_Network
    vm_netmask: 255.255.255.0
    vm_gateway: 192.168.1.1
    dns01: 8.8.8.8
    dns02: 8.8.4.4
    hosts:
      vm01:
        vm_name: vm01
        vm_ip: 192.168.1.101
        vm_ram: 2048
        vm_cores: 2
        vm_sockets: 1
        vm_notes: "VM01 Notes"
        vm_department: "department1"
        vm_application: "Application1"
        vm_role: "Role1"
        vm_env: "Development"
        vm_buildcode: "Build01"
        vm_lifecycle: "Lifecycle1"
        vm_contact: "Contact1"

      vm02:
        vm_name: vm02
        vm_ip: 192.168.1.102
        vm_ram: 4096
        vm_cores: 4
        vm_sockets: 2
        vm_notes: "VM02 Notes"
        vm_department: "department2"
        vm_application: "Application2"
        vm_role: "Role2"
        vm_env: "Testing"
        vm_buildcode: "Build02"
        vm_lifecycle: "Lifecycle2"
        vm_contact: "Contact2"

      vm03:
        vm_name: vm03
        vm_ip: 192.168.1.103
        vm_ram: 8192
        vm_cores: 4
        vm_sockets: 2
        vm_notes: "VM03 Notes"
        vm_department: "department3"
        vm_application: "Application3"
        vm_role: "Role3"
        vm_env: "Production"
        vm_buildcode: "Build03"
        vm_lifecycle: "Lifecycle3"
        vm_contact: "Contact3"
Adjusting the Inventory
-
Hosts and Variables: The example above assumes you are deploying three VMs (
vm01,vm02, andvm03). Each VM has its set of variables defined underhosts. You can add more VMs or adjust the existing definitions as needed. -
Global Variables: Variables that are common across all VMs are defined under
all: vars. This includes vCenter connection details, network configuration, and Infoblox provider details. These can be overridden at the host level if necessary. -
Customization: Tailor the inventory to match your environment's specifics, including vCenter details, template names, network settings, and VM specifications.
This approach allows you to manage your infrastructure as code, making deployments repeatable and reducing the likelihood of human error.
Playbook: deploy_vms.yml
---
- name: Deploy Multiple VMs on vCenter
  hosts: all
  gather_facts: false

  tasks:
    - name: Setting Facts
      set_fact:
        vm_guest_name: "{{ vm_name | upper }}"
        vm_hostname: "{{ vm_name | lower }}"

    - name: Deploy or Clone Linux VM
      vmware_guest:
        hostname: "{{ vcenter_hostname }}"
        username: "{{ vcenter_username }}"
        password: "{{ vcenter_password }}"
        validate_certs: no
        datacenter: "{{ vcenter_datacenter }}"
        folder: "{{ vcenter_folder }}"
        name: "{{ vm_guest_name }}"
        cluster: "{{ vcenter_cluster }}"
        state: poweredon
        template: "{{ vm_template }}"
        annotation: "{{ vm_notes }}"
        hardware:
          memory_mb: "{{ vm_ram }}"
          num_cpus: "{{ vm_cores }}"
          num_cpu_cores_per_socket: "{{ vm_sockets }}"
        networks:
          - name: "{{ vm_network }}"
            ip: "{{ vm_ip }}"
            netmask: "{{ vm_netmask }}"
            gateway: "{{ vm_gateway }}"
        wait_for_ip_address: yes
        wait_for_customization: yes
        cdrom:
          type: none
        customization:
          hostname: "{{ vm_hostname }}"
          domain: "example.com"
          timezone: "America/New_York"
          dns_servers:
            - "{{ dns01 }}"
            - "{{ dns02 }}"
      delegate_to: localhost
      register: vmcreate


    - name: Add Custom Attributes to the VM
      vmware_guest_custom_attributes:
        hostname: "{{ vcenter_hostname }}"
        username: "{{ vcenter_username }}"
        password: "{{ vcenter_password }}"
        validate_certs: no
        name: "{{ vm_guest_name }}"
        attributes:
          - name: Department
            value: "{{ vm_department | default('') }}"
          - name: Application
            value: "{{ vm_application | default('') }}"
          - name: Role
            value: "{{ vm_role | default('') }}"
          - name: Environment
            value: "{{ vm_env | default('') }}"
          - name: Automation
            value: "Baseline"
          - name: buildcode
            value: "{{ vm_buildcode | default('') }}"
          - name: lifecycle
            value: "{{ vm_lifecycle | default('') }}"
          - name: Contact
            value: "{{ vm_contact | default('') }}"
Explanation of Each Task
-
Setting Facts: Converts the VM name to uppercase and lowercase versions for different uses, such as the display name in vCenter (
vm_guest_name) and the internal hostname of the VM (vm_hostname). -
Deploy or Clone Linux VM: Uses the
vmware_guestmodule to either deploy a new VM or clone an existing one from a template specified in the inventory. This task includes configuring the VM's hardware specifications, network settings, and customization specifications like the hostname and DNS settings. It waits for the IP address to be assigned and customization to complete before proceeding. -
Add Custom Attributes to the VM: Adds custom attributes to the newly created VM in vCenter. These attributes can include metadata such as the department, application, role, and environment the VM is associated with. This helps in organizing and managing VMs based on these metadata.
Running the Playbook
To run this playbook, use the following command, ensuring you specify the inventory file:
ansible-playbook -i inventory.yml deploy_vms.yml
This command tells Ansible to deploy VMs as configured in inventory.yml, applying the settings and customizations specified for each VM.
Notes:
- Template Requirements: The template you use must be prepared for customization. For Linux VMs, ensure VMware Tools is installed, and the Perl scripting language is available for the customization scripts to run.
- Customization Script: VMware's customization mechanism uses a script that runs on the first boot. If the customization does not apply, troubleshooting may involve checking that VMware Tools is correctly installed and that the template is properly prepared for cloning and customization.
- Ansible and VMware Versions: Ensure you are using recent versions of Ansible and the VMware modules, as improvements and bug fixes are regularly added.
This method leverages VMware's powerful customization engine, allowing for a wide range of customization options beyond what was demonstrated here.
Windows Build Server
A service for building custom WIM images for deployments.
The WIM images may contain additional drivers or post setup deployment scripts.
WIM images can be server or desktop OS and are useful in virtual and physical environment deployments.
Build
To build the server, start with a fresh install of Windows Server. This example will be based on Windows Server 2016. The example should work on Windows Server 2019 with little to no modification.
Only a few modifications were changed to the installation.
- Server name
- Network Settings
- Driver installation
- Disable IE lock down settings. (Needed to download drivers)
- Create new local user in the administrators group. (Security will be configured later)
- Remote Desktop enabled for easy of use.
- Ansible prep powershell script run. Download Here.
Download the Windows Builder role or Private Data System playbook to deploy the build server.
Update the inventory file.
Run the deploy-winbuild playbook.
Configure
Updates.
The Windows update portion of the build can be very time consuming. To speed up the build time and the WIM updating process, the updates will be downloaded ahead of time. This is not necessary to run manually since the buld scripts will run the updates tools too.
Sign in to the Windows Build Server and go to the <wsus-offline-updater> folder.
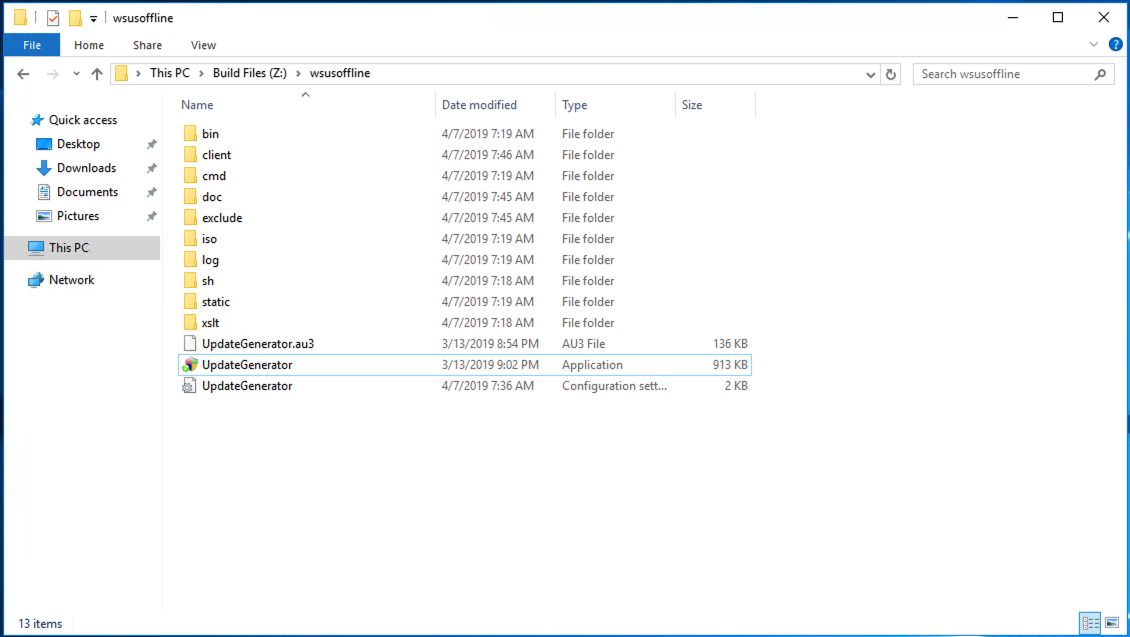
Run the UpdateGenerator.exe
Select the version(s) of Windows to download updates for.
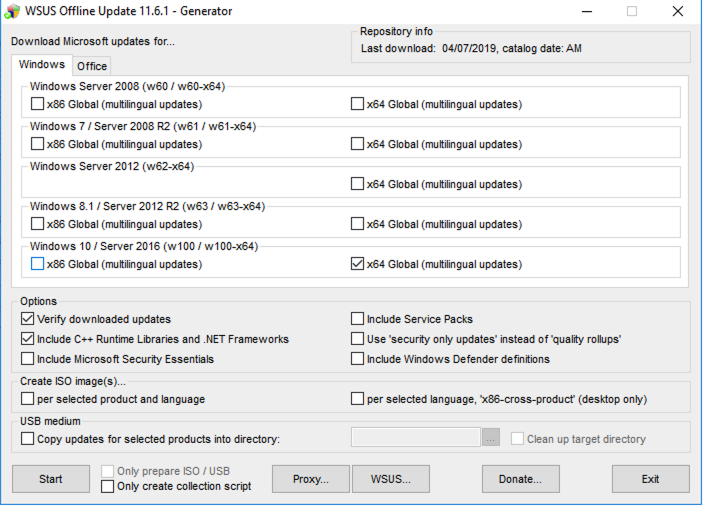
This example will only download updates for Windows 10 and Windows Server 2016.
After a few moments the UpdateGenerator will begin to run.
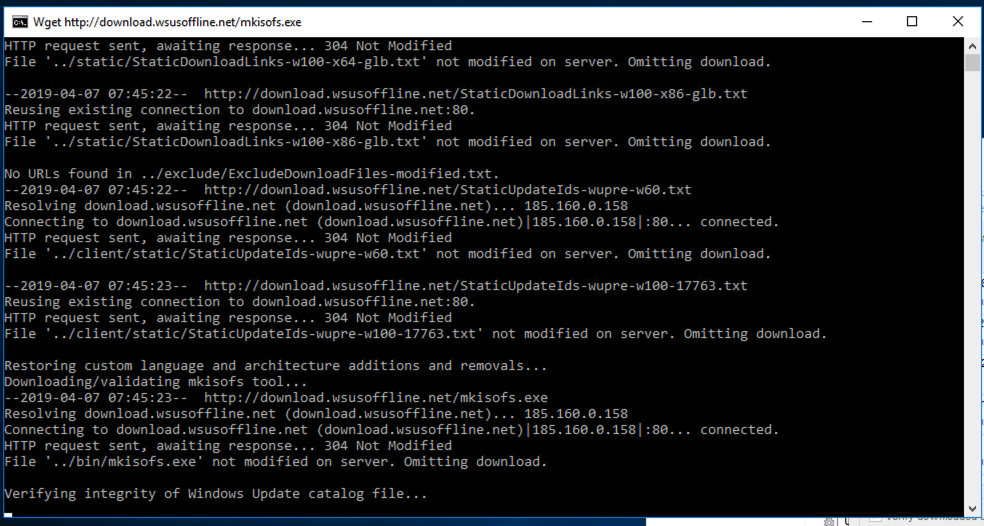
This process may take a very long time depending on the number of versions selected and if Office was included.
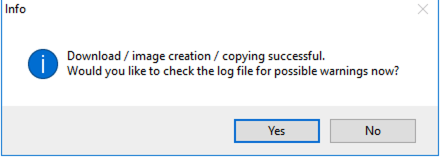
When the process is complete, a prompt will appear to review the logs.
Drivers
Sign in to the Windows Build Server and go to the source\Builder\Drivers folder.
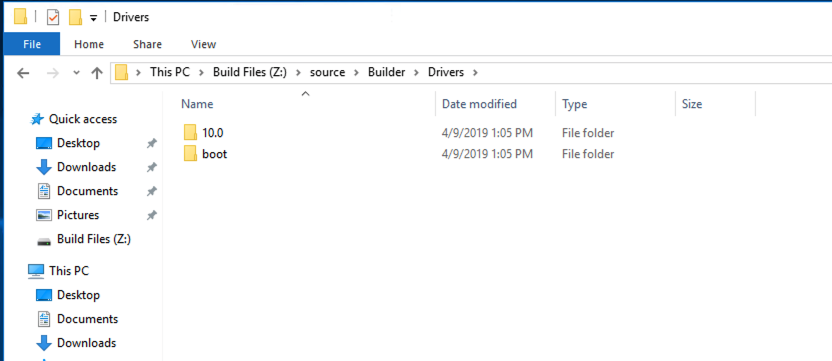
There are folders for each Windows version that can be deployed. The boot directory is for WinPE and 10.0 is for Windows Server 2016. Note that Windows Server 2019 will also build in the 10.0 folder. (For now)
Copy the drivers that are needed to the folders. The folders are recursively scanned, so add as many as you need. To keep the WinPE size to a minimum, only place drivers required for install in the boot folder. At a minimum, this would be the storage and networking drivers. For this example, the hypervisor is KVM. The virtstor and netkvm drivers were added to the folders. For the actual OS image place all of the needed inf in the folder. Multiple drivers for multiple hardware platforms can be copied to the folders to allow for a simple image to be used on many platforms.
If drivers require a setup file to be run, we'll add those to the post install playbooks. More on that later.
Images
There are two base WIM files that will be needed to build the custom ones. You will need a copy of the Windows Server ISO along with the Windows Assessment and Deployment Kit, and the Windows Assessment and Deployment Kit Windows Preinstallation Environment Add-on. Both Windows ADK components are installed when using the deploy-winbuild playbook.
boot.wim: Copy the winpe.wim file from C:\Program Files (x86)\Windows Kits\10\Assessment and Deployment Kit\Windows Preinstallation Environment\amd64\en-us to \source\Builder\SourceWims\boot and rename the files boot.wim.
install.wim: You will need a licensed copy of the Windows Server installation media for this step. If you configured the playbook to download the ISO file it will be located in the \source\ISO directory on the build system. Copy the DVD:\sources\install.wim file to \source\Builder\SourceWims\boot. Do not change the file name.
Building Images
Once all of the base requirements are in place, it is time to run the build scripts. These script are modified versions of the Foreman build scripts. Open the \source\Builder folder and run the Build-All.ps1 in an elevated PowerShell console.
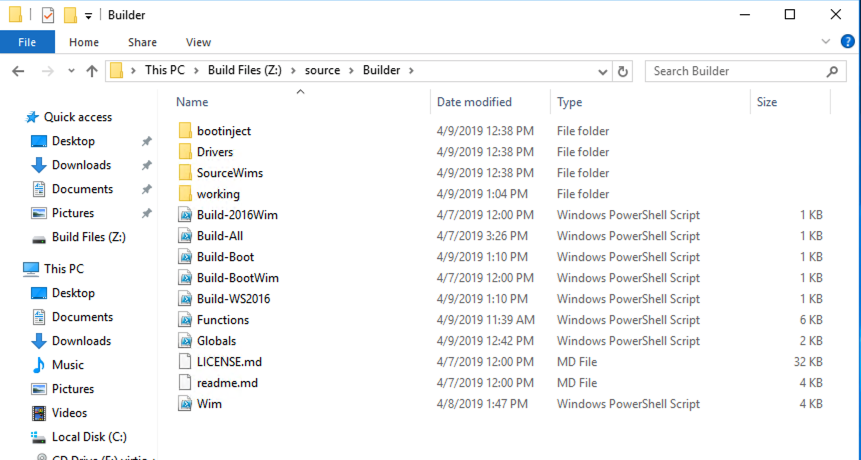

After the build scrips have created the new WIM files, they will be located in the \Deploy directory on the build server. Review the date modified and the file size to determine that the file has recently been updated. Unless the build scripts fail, most error messages can be ignored.
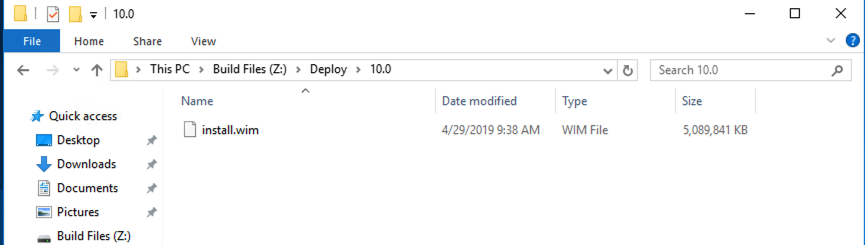
The deploy-winbuild playbook automatically shared this folder to the network. These files are now ready for deployment and can be used with your favorite deployment tools.
Windows Managed Node Setup
Setup a Windows host - local UI
Setting up a Windows Server to be managed by Ansible involves a few key steps. Ansible communicates with Windows servers over WinRM (Windows Remote Management), which is a Windows-native remote management protocol based on WS-Management (Web Services-Management). The setup process generally includes configuring WinRM on the Windows server and preparing the Ansible control machine to manage Windows hosts.
Here are the steps to prepare a Windows Server for management with Ansible:
1. Configure WinRM on the Windows Server
The easiest way to configure WinRM for Ansible is to use the ConfigureRemotingForAnsible.ps1 script, which is provided in the Ansible documentation. This script sets up WinRM to use basic authentication and configures it to allow connections from Ansible.
-
Download the Script: On the Windows Server, open PowerShell as an Administrator and run the following command to download the script:
Invoke-WebRequest -Uri "https://raw.githubusercontent.com/ansible/ansible-documentation/devel/examples/scripts/ConfigureRemotingForAnsible.ps1" -OutFile "ConfigureRemotingForAnsible.ps1" -
Run the Script: Execute the script you just downloaded:
.\ConfigureRemotingForAnsible.ps1This script will configure WinRM to use HTTP (port 5985), enable basic authentication, and create a firewall rule to allow WinRM traffic.
-
Note: For a production environment, it's recommended to use HTTPS (port 5986) with certificate-based authentication for increased security. This setup is more complex and requires installing a valid certificate on the Windows Server and additional WinRM configuration.
2. Prepare the Ansible Control Machine
On the Ansible control machine, which is typically a Linux system, you need to install pywinrm to enable WinRM support. This can be done using pip:
pip install pywinrm
3. Configure Ansible Inventory
Edit your Ansible inventory file to include your Windows hosts. You can define them under a specific group [windows] and specify the necessary variables:
[windows]
windows-server.example.com

[windows:vars]
ansible_user=Administrator
ansible_password=YourPassword
ansible_connection=winrm
ansible_winrm_server_cert_validation=ignore
Security Note: Storing passwords in plaintext in the inventory file is not secure. Consider using Ansible Vault to encrypt sensitive data.
4. Test the Configuration
Now, test your setup by running a simple Ansible command to ping the Windows server:
ansible windows -m win_ping
If everything is configured correctly, the win_ping module should return a success message.
Additional Notes
- Ensure network connectivity between the Ansible control machine and the Windows Server, specifically that the required WinRM port (5985 for HTTP, 5986 for HTTPS) is open.
- The setup process might vary slightly depending on the specific version of Windows Server you are using.
- For production environments, it's highly recommended to use Kerberos or NTLM with WinRM over HTTPS for secure authentication and encryption.
By following these steps, you should have a Windows Server ready to be managed by Ansible.
Remote install / fleet deployments
To remotely set up a Windows Server to be managed by Ansible, you need to configure WinRM (Windows Remote Management) on the target server. This process can be challenging since it ideally requires remote execution of a configuration script on the Windows server. If you have physical access or remote desktop (RDP) access to the server, it's usually easier to set up WinRM directly. However, if you need to do this entirely remotely, here are some methods you can consider:
1. Using PowerShell Remoting
If PowerShell Remoting is already enabled on the target server, you can use it to configure WinRM for Ansible.
-
Connect to the Windows Server via PowerShell Remoting:
$credential = Get-Credential Enter-PSSession -ComputerName <Target-Server-IP-or-Hostname> -Credential $credential -
Run the Ansible WinRM Configuration Script: Download and execute the
ConfigureRemotingForAnsible.ps1script within the remote session.Invoke-WebRequest -Uri "https://raw.githubusercontent.com/ansible/ansible-documentation/devel/examples/scripts/ConfigureRemotingForAnsible.ps1" -OutFile "ConfigureRemotingForAnsible.ps1" .\ConfigureRemotingForAnsible.ps1 -
Exit the Remote Session:
Exit-PSSession
2. Using Group Policy (For Domain-Joined Servers)
If the server is part of an Active Directory domain, you can use Group Policy to configure WinRM on multiple servers at once.
- Create a new GPO in your Group Policy Management Console.
- Edit the GPO to include the WinRM service configuration. Typically, you need to set up the service to start automatically and configure the listener for HTTP and/or HTTPS.
- Link the GPO to an OU that contains your servers.
3. Using a Configuration Management Tool
If you have a configuration management tool like SCCM (System Center Configuration Manager), you can use it to push out a script or configuration to enable and configure WinRM on Windows servers.
4. Using a Remote Execution Tool
If you have access to a remote execution tool like PSExec (part of Sysinternals), you can use it to run commands or scripts on the remote Windows server.
For example:
psexec \\target-server -u username -p password -h powershell.exe -ExecutionPolicy Bypass -File ConfigureRemotingForAnsible.ps1
Security Considerations
- When setting up WinRM, especially over HTTP, be aware of security implications. HTTP traffic is not encrypted, which can expose sensitive data. For production environments, HTTPS with certificate-based authentication is recommended.
- Ensure that the WinRM service is properly secured and accessible only from trusted networks or hosts.
Testing the Setup
After setting up WinRM, test the connection from your Ansible control machine:
ansible windows -i inventory_file -m win_ping
Replace inventory_file with the path to your Ansible inventory file where your Windows host is defined.
Conclusion
The method you choose depends on your current infrastructure, the tools you have available, and your access level to the Windows Server. For security and simplicity, direct access (like RDP) to set up WinRM is generally preferred, but in environments where this is not feasible, remote methods are necessary.